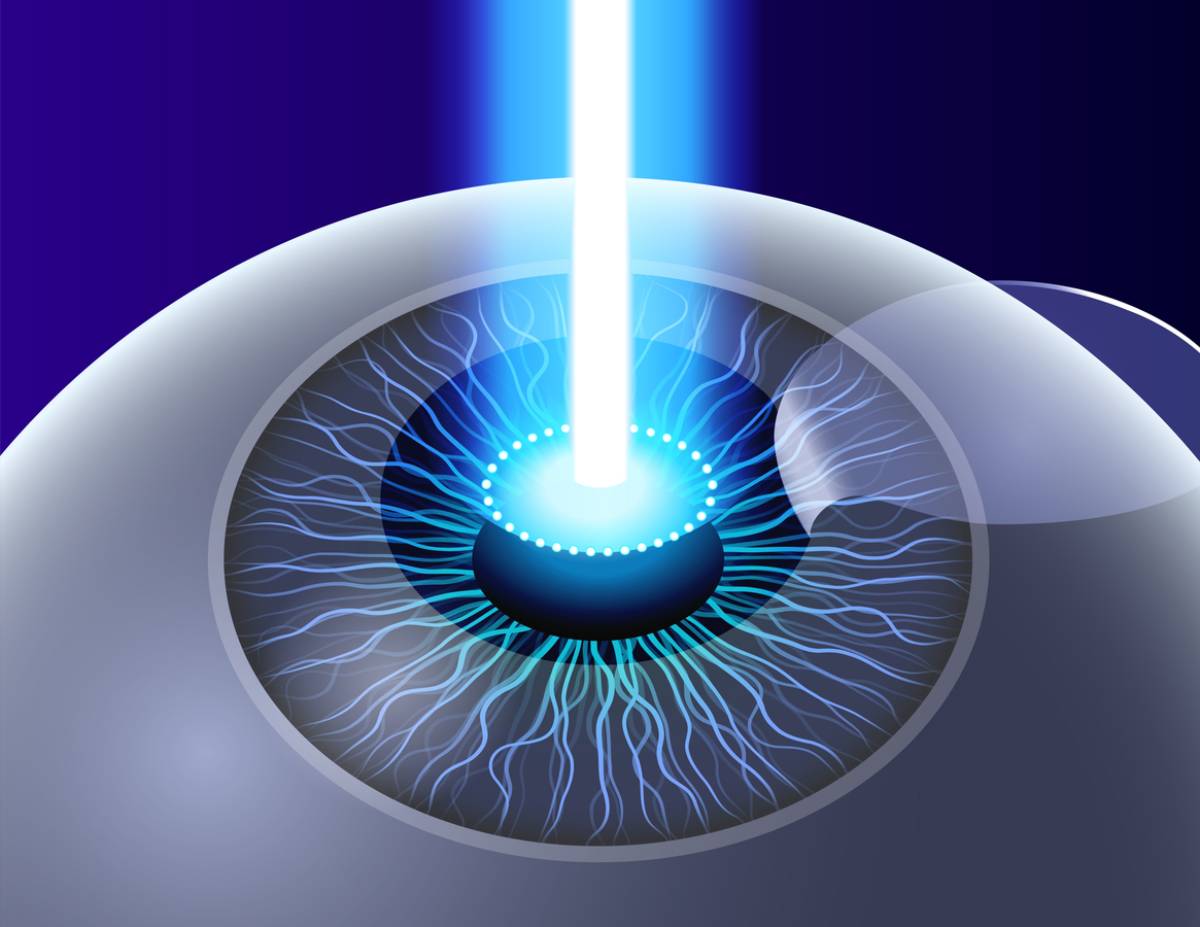
Featured image for Can Allergies Affect Your Vision

Can Allergies Affect Your Vision?

Allergies are often perceived as mere nuisances, manifesting through sneezing, congestion, and skin irritations. Even so, a growing body of evidence suggests that allergies can have lasting implications that extend beyond common symptoms. Conditions related to allergies can lead to a spectrum of eye-related complications that can negatively impact your vision and quality of life. Today, we answer the question, “Can allergies affect your vision?” and offer information about the connection between allergies and vision.


Can Allergies Affect Your Vision?

Studies have shown that allergies often affect vision. More than half of people living with allergies experience symptoms in the form of itchy, watery, and swollen eyes. These manifestations not only contribute to pain and discomfort but can also result in blurred vision to a degree that hinders daily activities. The interplay between environmental allergens and the exacerbation of symptoms suggests a clear correlation between allergies and reports of vision complications. 

While allergies may not be the direct cause of vision loss, their indirect effects on eye health can be profound. Addressing this often-overlooked aspect of allergy management is essential for improving patient outcomes and quality of life. 


What Causes Eye Allergies?

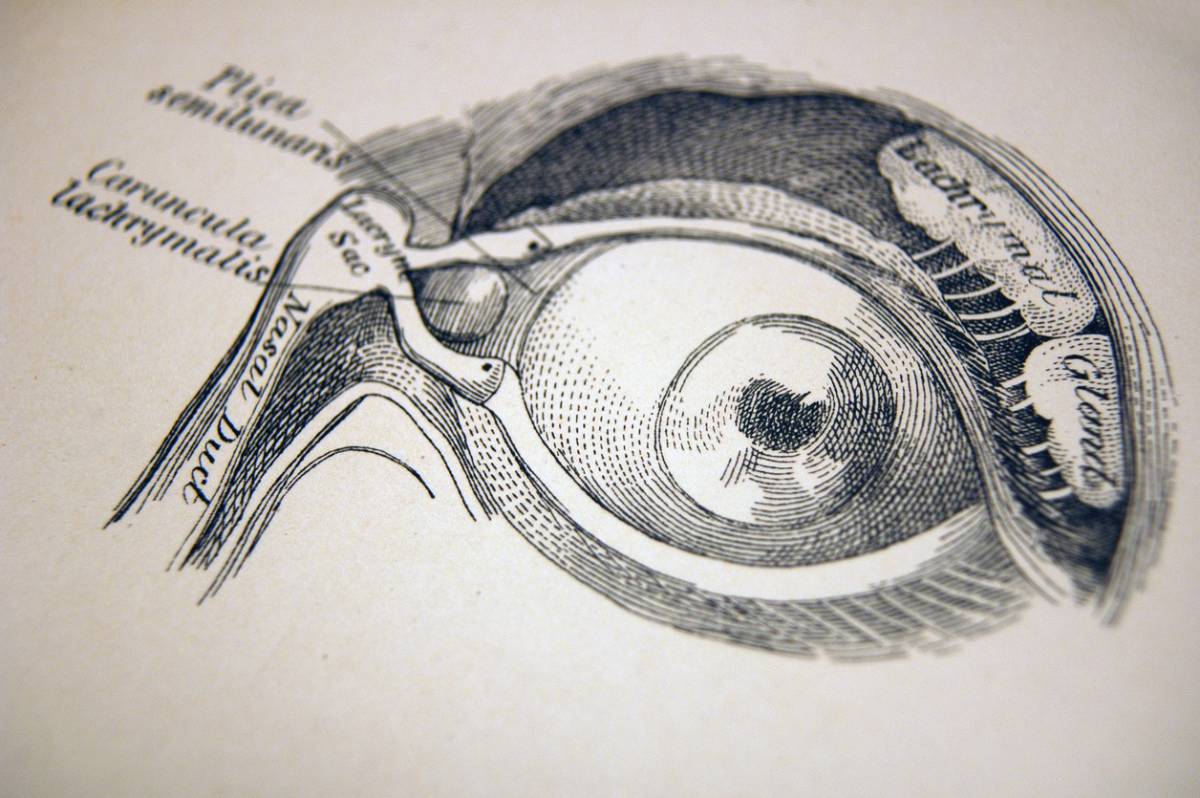
Allergies that impact vision are referred to as allergic conjunctivitis and generally result in itchiness, dry eyes, and blurry vision. While symptoms can vary from person to person, the cause is commonly the same. Your body encounters an ordinarily harmless environmental substance known as an allergen. This substance elicits a response in the form of the body’s overreaction to the foreign substance. 

A large number of substances can be considered allergens. Of those that often concern the eyes, the most common are:

  • Pollen from grasses, trees, and flowers
  • Dust mites
  • Pet dander
  • Mold
  • Perfume
  • Cigarette smoke
  • Diesel exhaust


Why Eye Allergies Are Exacerbated by Season

All of the allergens described are present year-round. This issue raises the question of why allergies are exacerbated during the spring and early summer months. Well, during these months, pollen counts multiply, and high winds occur more frequently than in other months. The wind blows and knocks allergens loose, then distributes them in the air for unsuspecting bystanders to find. Under normal circumstances, this event would be no issue, but for people with allergic conjunctivitis, this issue means redness, swelling, and discomfort. 


Symptoms of Eye Allergies,

Evidence concludes that eye allergies can indirectly or directly affect your vision. However, some other eye conditions share similar symptoms to allergic conjunctivitis. As such, having your eyes checked by a medical professional is vital in optimizing your eye health. 

Symptoms of allergic conjunctivitis include but are not limited to:

  • Itching
  • Watery eyes
  • Burning
  • Dry eyes
  • Red eyes
  • Dark under-eye circles,
  • Swollen eyelids
  • Light sensitivity
  • Watery or thick, discharge

If you are experiencing any of these symptoms, you are advised to seek medical advice. A doctor can address potential problems, ease your concerns, answer any questions, and create an individualized treatment plan. If symptoms persist, it could indicate a serious underlying condition with the potential to impair your vision. 


Vision Impairment Caused by Allergies

Vision impairment in the form of blurry vision can be caused by the body’s attempt to fight allergens when they enter the body through the eye. When allergens enter the eye, your immune functions are triggered, releasing histamines to combat the invader. In allergic reactions, the result can take the shape of swelling blood vessels in your eyes and eyelids. This swelling causes pressure to be applied to the eye and can create blurry vision. 

Similarly, wearing contact lenses can cause an allergic reaction in your eyes. This condition, giant papillary conjunctivitis, refers to symptoms of blurry vision and deteriorated vision correction because of the use of contacts.

Another common reaction to expel allergens from the eye is increased tear production. This layer of moisture can cause vision loss, though sometimes the vision impairment is due to a layer of mucus coating the eye, rather than excess moisture. 


Health Clinic in Abilene

Allergies can significantly impact the quality and strength of your vision. Early intervention and proper treatment are imperative for maintaining eye health and supporting overall well-being. Contact West Texas Health to treat your allergies today.

Featured image for Tips for Sitting Comfortably After a Thigh Lift

Tips for Sitting Comfortably After a Thigh Lift

A thigh lift is a cosmetic surgery that reshapes a person’s thighs in an attempt to improve their appearance. As with many plastic surgery procedures, the recovery period following your procedure is just as important as the procedure itself. How you navigate this period can mean the difference between receiving the results you want and needing to get revision surgery. In the case of a thigh lift, this may mean learning to sit comfortably in the immediate period following your procedure. In this article, we share tips for sitting comfortably after a thigh lift so you can get the most from your procedure.


What is a Thigh Lift? 

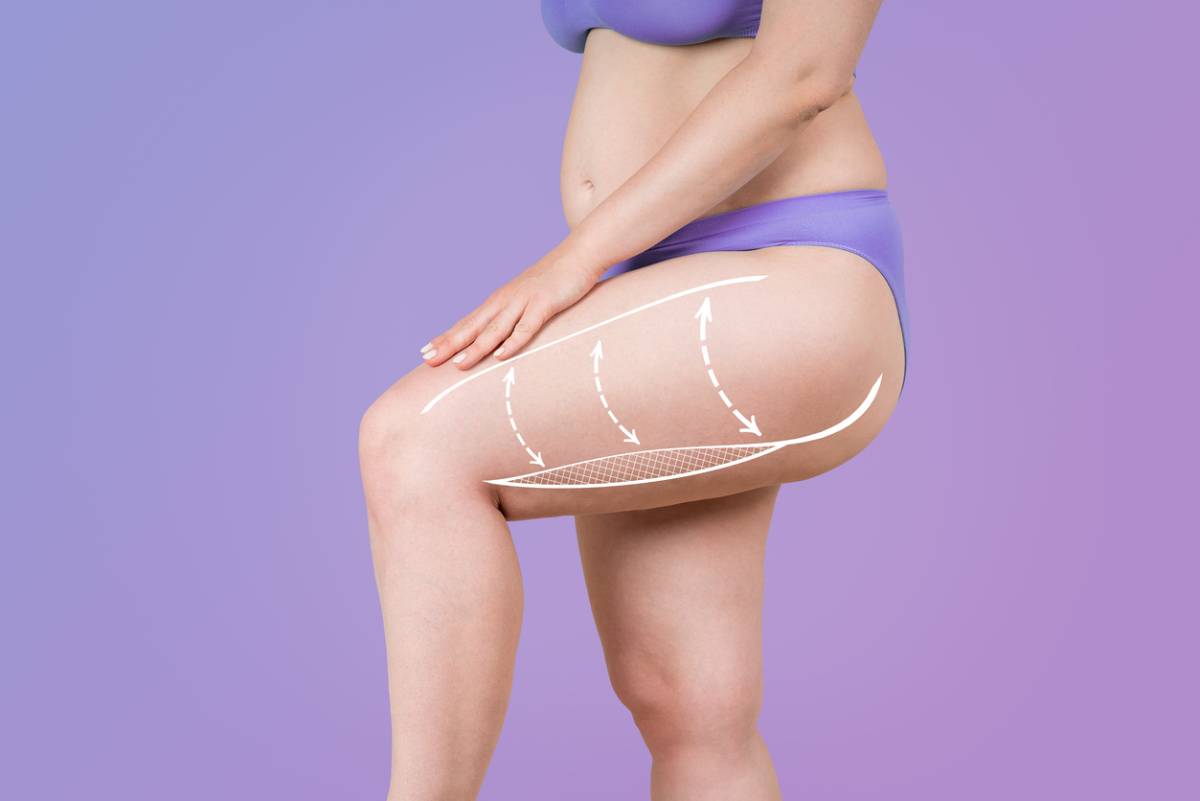
A thigh lift is a surgical procedure where a physician manipulates the excess skin and muscles of the thighs to give them a tighter and smoother appearance. This surgery is particularly popular with those who have recently undergone significant weight loss and are experiencing sagging skin in their thighs.


Tips for Sitting Comfortably After a Thigh Lift

There are some steps you can take to ensure that you will be more comfortable following a thigh lift procedure. Take heed of the following steps:


Avoid Prolonged Sitting

During the first few weeks following your procedure, you will need to avoid sitting for prolonged periods. Doing so can impact your results and inhibit the healing process that will assist your thighs with recovering from the surgery. It is normal for an individual to experience some level of discomfort in the initial period following their surgery, which may inhibit their ability to sit for long periods.


Stick to Bed for The First Week

Another pro tip for making your post-surgical period more comfortable is to get plenty of bed rest in the period following your procedure. Part of this process will include wearing compression garments that are given to you in this period. During this period and your surgeon’s specific method of completing the thigh lift, they may advise you to avoid resting heavily on the sides or bottoms of your thighs to avoid negatively impacting your results.


Be Patient 

It does take several weeks for an individual to fully recover from a thigh lift. In general, someone can expect to take around 4 to 6 weeks for their results to settle in and to stop experiencing some of the initial side effects of their surgery. In addition, many factors of an individual’s physiology can impact the overall scope of their recovery period. You can discuss with your physician prior to your procedure whether they think that you might experience any extenuating circumstances regarding your healing period.


Be Careful Getting Out of Bed 

You will likely spend a lot of time in bed recovering following your procedure. During this period, you will need to take increased care when you get in and out of bed. Your physician will likely recommend that you avoid using your upper body or your legs to push yourself up. It is generally recommended that you roll to your side to sit or stand in order to diminish the amount of impact that is incurred on your thighs when making these movements.


Be Careful When Using the Bathroom

You may need to take some care when you go to the bathroom in the initial period following the completion of your procedure. In the first couple of days, you may need to have someone assist you with walking to and using the bathroom. Although this may seem troublesome, you likely will not have to engage with this beyond the first couple of days after your procedure.


Talk With Your Physician 

You should feel comfortable talking with your physician about any aspect of your recovery process. Because everyone’s body is unique, you may have special circumstances that your physician can guide you through in terms of maximizing your recovery period and ensuring that you receive the best results possible. Sharing as much information as you can with them during this period is essential for unlocking the potential.


The Top Choice in Beverly Hills

Beverly Hills Plastic Surgery Inc. is a top resource for plastic surgery in Beverly Hills. If you are interested in discussing your plans for a thigh lift with an esteemed professional, contact us today to set up an appointment.

Featured image for Can You Floss With Veneers

Can You Floss With Veneers?

Veneers are a cosmetic dental solution that can dramatically change the appearance of your smile in just a couple of dental visits. They can solve issues such as stained, discolored, chipped teeth or teeth that are uneven in size and shape. But how do you take care of your oral health when wearing veneers? Can you floss with veneers? In this article, we answer this question and give other veneer care tips to make your dental restoration last.


Can You Floss With Veneers?

The short answer is yes. You can and should floss with veneers, as it is essential for maintaining good oral hygiene and avoiding cavities and gum disease. Both of these dental health problems can lead to the removal of your veneers to treat the issues. 

Nevertheless, flossing with veneers can be challenging for some people. Let us look at proper flossing techniques with dental veneers: 

  • When flossing with dental veneers, you must be careful and gentle to avoid accidentally dislodging them. Dentists recommend using waxed floss and moving it carefully up and down between your teeth. Do not push hard into the gums or snap the thread against your teeth.
  • Additional tools, such as floss threaders and interdental brushes, can help streamline the process of flossing with veneers. Ask your dentist to recommend the right size of an interdental brush.
  • It is also helpful to add a water flosser to your hygiene routine when wearing dental veneers. Although a water flosser can not replace traditional flossing or brushing your teeth, it has proven very effective as an additional tool. A water flosser uses a stream of pressurized water to loosen food debris and plaque on and between your teeth, making it easier to remove them with a traditional flossing thread and a toothbrush.


Other Veneer Care Tips

As previously mentioned, flossing is essential when wearing dental veneers, but it is not the only thing you need to do to preserve the health of your teeth and the appearance of your veneers. Below, we discuss our essential tips for wearing veneers.


Brushing with Dental Veneers

Brushing with dental veneers is similar to brushing your natural teeth: you should brush twice a day, making sure to clean your teeth on both sides and along the chewing surface. Do not use abrasive or whitening toothpaste on your veneers, as it can scratch their surface and prompt staining and discoloration. Instead, opt for a fluoride toothpaste that will strengthen your teeth and help reduce the amount of bacteria in the mouth.


A Diet with Dental Veneers

Porcelain veneers are stain-resistant and resilient, but they still can get discolored if staining foods and beverages is a big part of your diet. To preserve the appearance of your veneers, we recommend avoiding the following products:

  • Soda and other drinks containing dye 
  • Artificially colored candies
  • Red wine 
  • Brightly colored juices (grape, carrot, etc.)
  • Berries
  • Curry, paprika, and other brightly colored spices
  • Black coffee and tea
  • Beetroot and carrots

If you consume any staining foods or drinks, rinse your mouth or brush your teeth immediately after the meal, if possible.

Additionally, to avoid cracking or chipping your veneers, abstain from hard foods, foods that require significant biting force (for example, whole apples), or crunchy foods, such as crackers, nuts, etc. 


The Importance of Regular Dental Visits

Visiting your dentist every six months for a check-up and a professional cleaning will help preserve the appearance of your veneers and ensure that any dental health issues are spotted and treated in time. 

Even if you brush and floss thoroughly, some food debris and plaque are still likely to accumulate on your teeth and veneers over time. These substances can cause cavities and gum disease, but they also can make your veneers appear stained or discolored. If this happens, do not use over-the-counter whitening solutions, but consult your dentist. Often, a professional cleaning can significantly improve the appearance of dental veneers.


Make an Appointment Today

If you are considering getting dental veneers or need any of the veneer service procedures, do not hesitate to call our office and make an appointment with a reliable and experienced dentist. At the Smiles of Arcadia dental office, we will help you choose a cosmetic dental procedure that is suitable for your lifestyle and budget.

Featured image for Is Dental Health Genetic

Is Dental Health Genetic?

Some of us have fewer dental issues than others throughout our lives. But what does it depend on? Is dental health genetic, or does preventative dentistry play a significant role in the condition of your teeth and gums? In this article, we answer this question and give tips on how to improve and preserve your dental health.


Is Dental Health Genetic?

Genetics influences most of our traits, including dental health, to some extent. We might be prone to certain illnesses that we inherit from our parents or, on the contrary, be less susceptible to others.

Some people are born with stronger teeth and more resilient enamel, while others have softer enamel with more grooves. Grooves in the enamel make it easier for bacteria to linger on the teeth and can make it harder to clean the teeth sufficiently. Thus, the risk of cavities for people with soft enamel is higher. 

Another genetic trait that can play a role in your dental health is the chemical makeup of saliva. Saliva plays a significant role in fighting bacteria in the mouth. Thus, people with “thinner” saliva can be more susceptible to tooth decay and gum disease. However, the condition of our general health and dental health largely depends on the amount of care we take for our bodies and our life and diet habits. Below, we give tips on how to preserve or improve your dental health, regardless of the genetics you have.


Dental Health and Oral Hygiene

Even people who are lucky to have strong teeth due to their genetics will soon notice changes for the worse if their oral hygiene is habitually insufficient. Bacteria and food debris that are not removed from the teeth turn to plaque and then to tartar over time. 

Acid and bacteria in plaque and tartar eat away at the enamel of the teeth, causing cavities and gum disease. If not addressed in time, both these issues can eventually lead to tooth loss. Efficient and regular oral hygiene is the most essential preventive dentistry measure, helping to avoid many oral health issues and complicated treatments. 


Effective Oral Hygiene Tips

Here are several tips on how to boost your oral hygiene:

  • Brush your teeth for two full minutes in the morning and before going to bed. Make sure to remove residue from the front and back of the teeth and the chewing surface. Also, clean thoroughly along the gum line, as plaque tends to accumulate along and under the gums. 
  • Choose a brush that is suitable for you and cleans effectively. When brushing along the gumline, do not harm the gums or cause them to bleed.
  • Opt for a fluoride toothpaste. Fluoride is proven to remineralize and strengthen the enamel of the teeth, making them more resistant to bacteria. It also helps reduce the amount of bacteria in the mouth.
  • Floss your teeth every evening, removing food residue between the teeth but making sure not to harm the gums with the flossing thread. If flossing is challenging for you, try additional tools such as a floss threader or interdental brushes. 
  • Consider using a water flosser as an additional step in your hygiene routine. When used before brushing and flossing, a water flosser can help loosen plaque and food debris and make it easier to remove them with a toothbrush and floss. It can also boost the effectiveness of fluoride toothpaste and help fight gum disease.
  • Visit your dentist every 6 months for a professional deep cleaning and a fluoride treatment, even if you enjoy good oral health. Most of us have areas in the mouth that are hard to reach when brushing and flossing, especially if the teeth are not aligned perfectly. As a result, some plaque and tartar might accumulate in these areas. On top of that, once plaque turns into tartar, it is impossible to remove using just a toothbrush. Your hygienist has special tools and products to effectively remove both plaque and tartar, thus preventing cavities and gum disease.
  • Consult an orthodontist if you have a significant midsegment, as this can influence how well your teeth can be cleaned daily. In some cases, orthodontic treatment can reduce the risk of gum disease and cavities and improve the general condition of the teeth and gums.


Make an Appointment Today

Boost your dental health by making an appointment with a reliable dentist at the Smiles of Arcadia dental office today. We will conduct an examination of your teeth and gums to offer you an effective treatment plan. Our specialists look forward to your visit. 

concept for what to expect at your first cardiology appointment

What to Expect at My First Cardiology Appointment

Cardiologists specialize in diagnosing and treating conditions that affect your heart. Your primary care provider may recommend a visit to the cardiologist. Heading to your first appointment can be nerve-wracking. However, going to an appointment is necessary for your health. Feeling good about your appointment can ease your fears and reduce your anxiety. You may wonder what to expect at my first cardiology appointment. Below, you will find helpful information to guide you through the process.

What to Expect at My First Cardiology Appointment

Cardiologists are trained to understand issues with your heart. They use advanced tests to diagnose and treat the heart. Echocardiography is a common method to get a good picture of your heart. From there, cardiologists can work on effective treatment plans to ensure you stay in good health. Before you head to your first appointment with a cardiologist, consider the following information to get prepared.

Before Your Appointment

Before your first appointment, prepare any information the cardiologist’s office requests. This may be medical records, family history, and your current medications. Gather as much information as possible to help your cardiologist better understand your current health. This can help them narrow down the possibilities when it comes to your current symptoms.

Note down your current symptoms and the frequency and severity of them. You may feel nervous or easily forget things when you are at the appointment. In addition to your current symptoms, write down any questions that you have. This is helpful so you get a better understanding of your current health.

The Day of Your Appointment

Wear comfortable clothing and arrive early. You may need to dress down for a physical examination. If you are concerned about this, be sure to ask in advance. In many cases, you will need to have a physical examination of your chest.

Arrive at least 15 minutes early to your appointment. This can help reduce your anxiety and ensure you do not feel rushed. You will likely have to fill out paperwork, so fifteen minutes is a great cushion for that. If possible, fill out any paperwork early to streamline the process. Be sure to pack the documents you gathered, your identification, and insurance information.

At the Cardiology Appointment

In the majority of cases, you will be met with a nurse. They will likely measure your height and weight, take your vital signs, and ask about why you are at the appointment. This is all preparation for the cardiologist so they have a good idea of what is going on in advance.

The cardiologist will then meet with you to discuss your symptoms and answer any of your questions. They will discuss the next steps with you to be sure you are on board. Once you both have agreed, they will create a personalized treatment plan based on your unique needs. This will likely include a physical examination at the appointment. From there, they will likely order diagnostic testing for a later date. However, some offices may have you do them at the same appointment.

Diagnostic Testing and Your Results

One of the most common diagnostic tests cardiologists order is an echocardiogram. This test allows them to get more information about what is going on with your heart. This is a non-invasive and painless exam. It lasts no more than one hour and is essentially an ultrasound of your heart. Additional testing may include an electrocardiogram (“ECG”), stress test, or blood test.

Once your results are in, the cardiologist will go over them with you. From there, a treatment plan is created to address your health needs. This may include medication, lifestyle changes, or both. Follow-up appointments may be necessary to ensure your treatment is working.

Apex Cardiology

If you need to see a cardiologist, schedule an appointment at Apex Cardiology today!

concept for a nonsurgical neck lift

How Long Does a Neck Lift Take?

The signs of natural aging show up on your neck. This can be in the form of sagging skin, wrinkles, and vertical bands. These issues can be the result of natural aging or poor lifestyle habits. No matter how young your face looks, your neck can show your age. This can impact one’s self-esteem and your overall facial aesthetic. There are several treatment options to address the signs of aging on your neck. There are both neck lifts and non-surgical neck lifts. You may wonder, how long does a neck lift take?

How Long Does a Neck Lift Take?

Addressing the signs of aging on your neck can improve your aesthetic and your self-confidence. Despite the benefits of improving your look, people often wonder about the timeline of these procedures. A traditional neck lift can take several hours to complete and several weeks to recover from. However, a non-surgical neck lift takes much less time and you can see your results in as short as one week.

A non-surgical neck lift includes Coolaser and Neustem. Combining both treatments can easily target the signs of aging on your neck. This includes banding, fine lines and wrinkles, loose skin, stretchy skin, and uneven texture. Patients with minor signs of aging may only need one to two treatments. However, patients with more advanced signs of aging benefit from four to five treatment sessions. Both can see results within just one week after the first treatment.

Non-Surgical Neck Lift Technology

For patients who do not want to get a traditional neck lift, a non-surgical neck lift is highly effective. A non-surgical neck lift uses Coolaser and Neustem technology to rejuvenate your neck. Combining both treatments maximizes your results, leaving you looking years younger.

Coolaser System

Coolaser utilizes a fractional CO2 laser to treat problem areas around your neck. It delivers precise laser energy that offers several benefits. The laser system eliminates dead and damaged cells. It also tightens your skin and boosts collagen production. Boosting collagen production continues to promote healthy and younger-looking skin even after treatment.

Coolaser lasts no more than one hour, depending on the extent and size of the treatment area. Treatment is fast and comfortable. You can expect to see results within just one week after your first treatment. Due to the aesthetic benefit of treatment, patients often report a boost in self-confidence.

Neustem Treatment

Neustm injections are combined with Coolaser treatments to enhance your results. The injections are used to fill out lost volume. They also help boost collagen. Combining both treatments maximizes collagen production, which lasts well after treatment. Improving collagen production can reduce the signs of aging by improving the look of your skin.

Nuestem injections are fast and smooth, as they take less than thirty minutes. It is done in the same treatment session as your Coolaser. The infections leave your neck looking better by reducing the appearance of wrinkles. They also create a tighter appearance, leaving you looking years younger.

Cosmetic Dermatology Treatment

A non-surgical neck lift is a highly popular cosmetic dermatology treatment. It offers so many benefits as it leaves you looking refreshed and youthful. The non-invasive procedure provides immediate results that last. One of the major benefits of a non-surgical neck lift is that there is virtually no downtime or recovery. You can get back to your daily routine within 24 hours or less.

The first step in moving forward with treatment is scheduling a consultation. From there, a customized treatment plan is created to address your aesthetic concerns. If you are interested in a non-surgical neck lift, contact the team at Epione today to schedule an appointment!

featured image for what to buy for breast reduction recovery

What to Buy for Breast Reduction Recovery?

You’ve decided that investing in some products to help during the recovery process of breast reduction would be beneficial, and that is often the case, depending on what you purchase. The key to getting back on your feet and feeling normal as painlessly as possible is choosing appropriate items that support your recovery. Yes, your plastic surgeon will provide you with what you need following your reduction mammoplasty, but there may be a thing or two you should consider purchasing that will promote a more restful recovery. With so many products being advertised as helping recover after a surgical procedure, it can get overwhelming to determine what you need and what you would be wasting your money on. Discover effective products you should buy for breast reduction recovery.

What to Buy for Breast Reduction Recovery?

Comfortable Clothing

Your plastic surgeon and care team will provide you with all the post-op necessities required to prevent infection and manage recovery symptoms. Additionally, it may be beneficial to splurge on some post-op luxuries as well.

  • Post-Surgery bras. If you are someone who prefers to wear a bra, even during recovery, some options will limit any discomfort. Look for bras that have a front closure, which will make it easier to put on and take off than a back closure.
  • Loose-fitting tops. Following your procedure, you will want to limit the amount of pressure applied to breasts as much as possible. Looser-fitting clothes are going to provide less pressure and more comfort post-op. Consider button-ups or zipper hoodies for easy dressing that reduces the amount of movement necessary. Soft stretch materials are going to offer the most comfort and breathability.

Supportive Pillows

  • Body pillows. Body pillows offer support and comfort during recovery. They can provide easier access to positions that better alleviate any pressure your breasts may be under.
  • Extra pillows. Elevation to reduce swelling is a tried and true home remedy. Extra pillows are good for keeping areas of the body elevated to support blood flow and reduce bruising and swelling.

Supplies for Pain Management

  • Pain relievers. With any surgery, you are likely to experience some discomfort. Over-the-counter medications like ibuprofen and acetaminophen are a great way to ease pain and can be alternated for maximum pain relief.
  • Ice packs. From sports injury to post-op icing, the affected area is always a go-to remedy to reduce swelling and ease pain. Gel packs are a great option for ice packs as they can be molded to suit your needs.
  • Cold water bottle. If you are on the hunt for something a little sturdier than ice packs, a cold water bottle might be for you. Like a hot water bottle, cold water bottles are typically silicone and are used to ease pain and swelling. The only difference is that instead of hot water, you will fill the water bottle with very cold water.

Surgery Site Care Supplies

  • Bandages and gauze. Your care team will provide you with any wound care supplies you may need, but having some extra on hand is never a bad idea.
  • Nonstick pads. Nonstick pads are a great tool in wound care. They keep any blood or seepage from fusing into the gauze. This keeps the gauze from removing the layer of dried blood or infection from being torn away during removal and reopening the wound.
  • Antiseptics. Any antiseptics or topical ointments should not be applied unless specifically stated by your physician. All after-surgery instructions must be followed. If it pertains to the care and recovery following your procedure, consult with your doctor before going any further. Your care team is a vital resource during the recovery process of a reduction mammoplasty.

The Road to Recovery

When being diligent on your road to recovery, it is important to consult with your surgeon about any specific details about your recovery. Techniques and recovery procedures vary from surgeon to surgeon, and there is no universal technique that is good for everyone. Any information gained that doesn’t come from your surgeon or care team should not be implemented above your official post-op instructions. Instructions provided by your healthcare team always take precedence.

However, adding in a few purchases for comfort that alleviate pressure and reduce swelling will very rarely get any argument over. Remember, these products are not necessary for a healthy recovery. Purchasing products that are going to aid in your recovery doesn’t have to be complicated or expensive. With a couple of well-informed purchases, you will be on your way to optimal recovery.

References:

Dickie, S. (2022). What to expect after your breast reduction surgery.

Featured image for Can You Get Ptosis from Botox

Can You Get Ptosis from Botox?

Ptosis is a condition of the eyelids that describes when the upper eyelids begin to droop over the eyes. This condition can negatively impact a patient’s life in both an aesthetic and practical sense if left unchecked. Ptosis can arise for a number of obvious and more surprising reasons. This reality has led many to ask, “Can you get ptosis from Botox?”. If you have Botox treatment planned and are concerned about developing ptosis, take a look at this overview of the subject and your options for ptosis repair. 


What is Ptosis?

Ptosis is a condition in which the upper eyelids begin to droop in front of the eyes. This can obscure one’s vision and create a somewhat strange appearance. In extreme cases, ptosis can even interfere with one’s ability to perform day-to-day activities.


Can You Get Ptosis from Botox?

Unfortunately, it is possible to develop ptosis accidentally from botox injections. Although rare, this is a risk factor that those seeking Botox injections should consider. Botox-induced ptosis can arise from different types of injections, which are outlined below:

  • Forehead Botox: If you receive Botox injection on your forehead, the toxin can sometimes spread to the frontalis muscle, which can subsequently relax the brow too heavily and cause it to droop and press down on the upper eyelids.
  • Frown Line Botox: Frown line botox refers to the injections a patient receives to adjust the appearance of their frown lines. This can impact the levator palpebrae superioris muscle that controls the upper eyelids.

Botox-induced ptosis may go away on its own. However, it should be noted that it can take months to resolve naturally, and there is no guarantee. Some patients may find that they need to resort to other means to correct Botox-induced ptosis.


Preventing Ptosis from Botox

You can reduce the chance that you will endure ptosis following a Botox treatment by taking certain precautions. Some of the following steps can help ensure that you retain your desired results while reducing the risk of developing ptosis:

  • Communicate with your physician regarding any medical conditions
  • Choose a qualified medical provider
  • Follow the aftercare tips provided by your physician

Your physician may have specific guidelines to give to you regarding precautions to take, depending on your medical profile and history. You should take extra care to follow whatever directives they prescribe.


Treating Ptosis

The primary method for treating ptosis is through eyelid surgery or blepharoplasty. This type of procedure is a surgery that is designed to modify the appearance of the eyelids and the surrounding areas of the face. There are several types of blepharoplasty, and the one that is used to treat ptosis is called upper blepharoplasty. The steps of ptosis repair surgery generally go as follows:

  • Your physician makes an opening in the skin of the upper eyelids.
  • The muscle that needs to be raised is identified and tightened.
  • The skin of the upper eyelids is then closed with stitches.

There are some complications that are possible with this type of surgery. You should take the following into account when you are planning to undergo ptosis repair surgery:  

  • Surgical site infection
  • Accidental damage to the eyes and eyelids
  • Incomplete results
  • Inability to resolve the ptosis
  • Bleeding and swelling

Other Causes of Ptosis

Although Botox injections can cause ptosis, there are other sources of this condition as well. Ruling these out can help your physician determine whether your particular case of ptosis is a result of your Botox injections:

  • Horner syndrome
  • Nerve damage
  • Stroke
  • Styes
  • Horner syndrome
  • Incorrectly executed plastic surgery

In addition, ptosis can simply be the result of the natural aging process. As one ages, the skin and muscles that surround the eyes can lose their strength and begin to stretch and weaken. If this occurs to a certain point, then a patient can develop ptosis.

In general, it is medical wisdom that treating ptosis sooner rather than later is ultimately the best course of action for resolving ptosis satisfyingly and safely. If you suspect that you may be developing ptosis thanks to Botox injections, make sure to contact your medical provider right away.

Your Friends in Eye Surgery

Nevada Eye Plastic Surgery is dedicated to offering the residents of Nevada and beyond the best in eyelid surgery. If you have a case of ptosis that has developed following botox injections, contact us today to discuss your treatment options.

Featured image for Does Breast Reduction Leave Scars?

Does Breast Reduction Leave Scars?

Breast reduction is a plastic surgery procedure that reduces the overall size of an individual’s breasts. This surgery can have a huge positive impact on a person who is facing issues like back pain and sleeping difficulties as a result of their chest size. Though the surgery can improve a person’s well-being, many still have questions about the side effects of this procedure. Specifically, prospective patients ask questions such as “Does breast reduction leave scars?”.

If you have a breast reduction surgery planned and are worried about the scarring you might incur, take a look at this guide that can help you navigate this element of the procedure.

What is Breast Reduction?

Breast reduction refers to a surgery that reduces the size of one’s breasts. People undergo the procedure for a range of cosmetic, medical, and functional reasons. The surgery can be performed for males or females.

Does Breast Reduction Leave Scars?

Most breast reduction procedures will leave some scarring. These scars form along the lines of incisions that your physician will make to access your breast fat. These incision lines will become scar tissue that differentiates from your natural skin tone. Still, there is a high level of variability in relation to the look of the scars that form after your surgery. The look of your breast reduction scars will depend on the following factors:

  • The type of breast reduction procedure performed
  • Your breast size
  • Your breast shape and symmetry
  • The scale of your breast reduction

Will Breast Reduction Scars Fade Naturally?

Many patients find that their breast reduction scars do significantly fade over time. Although every patient has a unique recovery timeline, the following benchmarks are generally accurate:

  • Six weeks: For the first six weeks following your procedure, you will have bandages over your surgical site. Your physician will provide some guidelines advising you when to remove your bandages. In this initial period, your scars may be quite noticeable.
  • Six months: Within the first six months of your procedure, your scars will still likely be quite noticeable. You will not need a bandage to cover your scars at this point. The inflammation surrounding the scarred parts of your breasts will likely have significantly subsided at this point.
  • One year: Within one year of your initial procedure, you should find that most of the scarring you have experienced has subsided. The slightly off-colored scars may still be visible to a small degree.

Habits to Avoid

Some activities may exacerbate the formation of breast reduction scars on the body. The following activities should be avoided in order to reduce the chance of making your breast reduction scars worse:

  • Scratching your scars
  • Smoking
  • Excessive alcohol intake
  • Sun exposure

In addition, you should take steps to ensure that your surgical site and scars remain clean and free of interfering factors in the first several weeks following your procedure. Keep an eye on any excess swelling or pain that arises that seems beyond the scope of what your doctor says is expected.

Treating Breast Reduction Scars

There are several treatments available for eliminating or heavily reducing the presence of breast reduction scars. The following are effective scar removal options:

  • Silicone ointment
  • Corticosteroid injections
  • Laser skin resurfacing
  • Massage
  • Laser treatments
  • Creams and ointments

You should discuss with your physician which of these treatments would work best for your particular situation.

There are some risks inherent in attempting to reduce or remove breast reduction scars. Your physician may warn you about the following:

  • Further skin discoloration
  • Itching
  • Peeling skin
  • Numbness
  • Injection site pain

Considering these risks can help you determine whether eliminating these scars is ultimately in your best interest. Your physician can advise you on your risk for side effects based on your medical profile.

Your Best Option in Beverly Hills

Beverly Hills Plastic Surgery Inc. is widely regarded as one of the best celebrity plastic surgeons in California. If you would like to discuss a breast reduction procedure with a professional, contact our office today to schedule an appointment.

Featured image for How Long Does a Nuclear Stress Test Take

How Long Does a Nuclear Stress Test Take?

Imagine your doctor or someone you know has mentioned taking a nuclear stress test, and now, you find yourself falling into the rabbit hole of information available on the internet. Wading through the ocean of knowledge the internet has to offer can be a painstaking task. Save yourself the time and anxiety of searching page after page, and find all the information you are looking for in the contents of this article. Below, we share the answer to the question, “How long does a nuclear stress test take?” as well as information on what it is, the procedure, and any key points about the test. 


What is a Nuclear Stress Test? 

Nuclear stress tests are a non-invasive tool used in nuclear cardiology to provide your physician with helpful information about your heart. Doctors use this diagnostic tool to evaluate the overall health of your heart and assess how it functions under stress conditions. But what can a nuclear stress test tell you about your heart? 

For starters, this diagnostic imaging technique assesses the blood flow to your heart and evaluates function. The data collected can then be used to detect coronary artery disease and determine if there are any blockages present in the arteries. If there are abnormalities found in the data from your test, it opens the door to creating the most comprehensive and effective treatment plan. 


The Procedure

Before the test, your care team gathers a complete medical history and lifestyle record, which sets boundaries for the exercise portion. The test is relatively straightforward.

During a nuclear stress test, your physician will insert an IV into the arm to deploy a substance called a radioactive tracer. In addition, they will fix a blood pressure cuff to your bicep to monitor your blood pressure. They will attach electrodes to your chest and, possibly, your legs and arms to record the rhythm and strength of your heart muscle. 

After your heart cells absorb the radioactive tracer, your physician will instruct you to lie on a table where they will take the first set of images. This creates a baseline for comparison for your physician. Up next is the exercise portion of the test.

For this part of the test, patients typically walk on a treadmill or ride a stationary bike. At the peak of your heart rate, your physician will add more tracers to your IV, followed by the second set of images. When your doctor reviews the images, areas of the heart that are not getting enough blood flow will light up from the tracer injected through your IV. 

Should you feel discomfort at any time, you can stop exercising and inform your physician. It is common for patients to continue exercising until a predetermined goal has been achieved or aversive symptoms arise, such as:

  • Irregular heartbeat
  • Dizziness
  • Moderate to severe chest pain. 
  • Extreme shortness of breath
  • Atypically high or low BP

Following the test, your physician may ask you to lie down for a short period to assess your heartbeat and breathing. You will expel the tracer through your urine or stool, so drinking plenty of fluids will help flush the system of the chemical. 


Duration

A nuclear stress test is a more time-consuming endeavor. This diagnostic tool can take two or more hours to complete, so be sure to plan accordingly. While the test itself is timely, the benefits and data it provides are invaluable. 

Diagnostic testing is vital for both prevention and proactive treatment. The earlier your doctor detects problems, the more positive the outcome. If they uncover abnormalities, your healthcare team can help create a treatment plan that targets your specific condition.


Results

The data gathered will point to one of four results: typical blood flow during rest and exercise, typical blood flow during rest but not exercise, atypical blood flow during rest and exercise, or lack of blood flow in parts of the heart. Your care team will review your results and discuss any necessary next steps. If your test results are normal, you may not need more tests.

Those with a lack of blood flow to parts of the heart may need to undergo further testing, such as coronary angiography. This tool can show any blockages in the heart. If there are any severe blockages, your care team may advise that an angioplasty with stenting or coronary bypass graft surgery would be beneficial to tackle them.


Conclusion

A nuclear stress test is a valuable non-invasive diagnostic tool that can elevate heart rate and blood flow. If you have concerns about your heart, open a line of communication between you and your cardiologist. Being proactive in your health and well-being will pave the way to being and feeling your best.